Showing posts with label studio. Show all posts

Tuesday, September 16, 2025

Back in the Studio


I finally got back into the studio. It was messy, so I was avoiding it. Anyway I cleared off the crap that was all the tables and put it all back where it belonged.

And you know, in for a penny, in for a pound. Having done my work table and the ironing table, I just went back in after lunch and did the rest. I love it when the studio is all nice and neat. I washed all the tables and I even washed the cutting mats. (I feel so virtuous! LOL)


 Then I got some actual work in. I prepared the bindings for each of the green quilts. I'll add the binding to the quilts tomorrow.


Monday, September 23, 2024

Stash Reorg


It only took a month, but I have finally finished reorganizing my stash. And not just my stash, but the piles of fabric I had lying on the extra table, stacked on the recliner and thrown all over the place.

I ended up getting some shelf dividers from Amazon and that helps keep some of the stacks separate, and keeps them from falling into each other. This should help me keep it nice and tidy. I even used some to create more space on the top of the bookcase. I had had lots of large pieces of fabric - many planned for backings of future quilts, and now ALL those have been ironed and folded and are neatly arranged on the top of the bookcase. I'll need a step stool to reach them, but that's no problem.

Moreover, all the worktables are clear and I can get to work without the added visual stress of the fabric clutter all over the room. To be sure, I have several quilts in mind after revisiting all those fabrics, and I can't wait to get started.

And there's a new tutorial I want to write, and an old one I want to update and a pattern I should write. 
And I want to add a row to the bottom of the Little Blocks quilt because it looks too square and I got the Peonies quilt back from the long arm quilter and I have to add the binding and finish it.

Gosh, I sure am glad I am retired!


Monday, January 30, 2023

Cleaning the Studio!

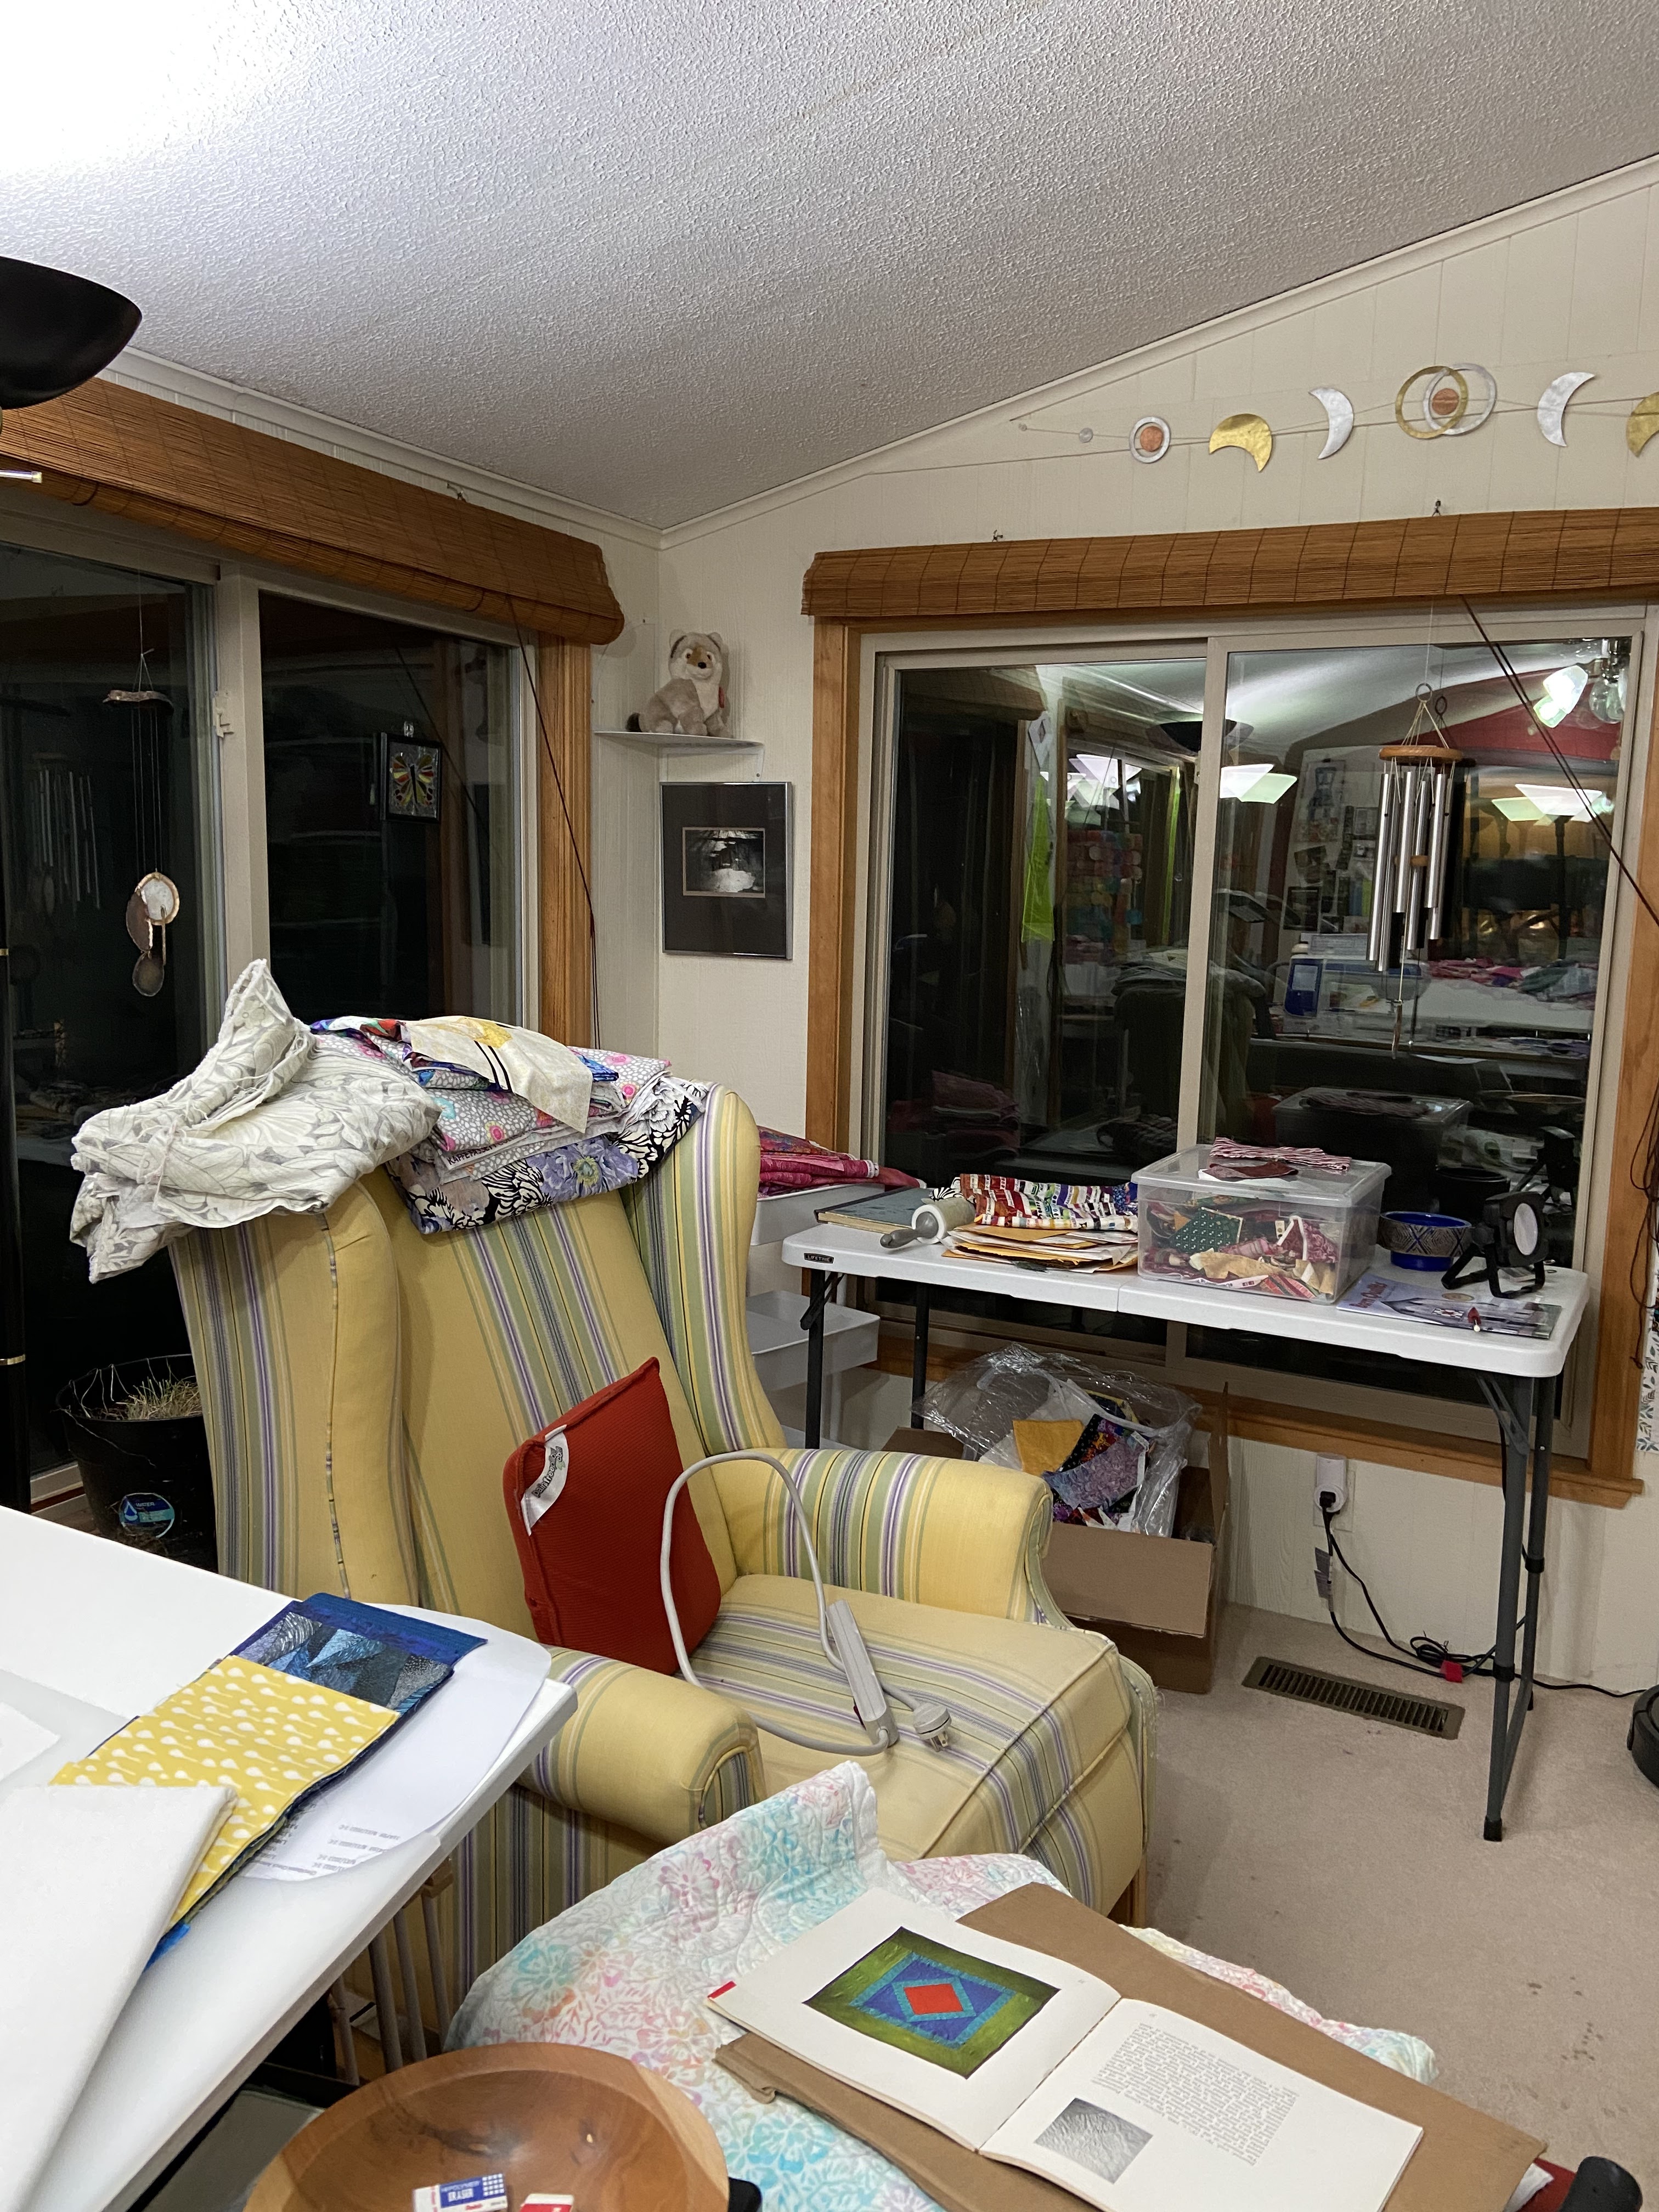
 In order to get working in the studio I had to do some clean up so I had room to work. It turned out that I had to do some DEEP cleaning.

Because it is getting harder for me to reach things that are stored up high, I've put a bookshelf behind my cutting table. I've put all the things related to my tutorials there. It meant I had to move my work tables a bit, but the space there was wasted so now it isn't.


Next I cleaned everything on the long shelf under the windows. I cleared everything off, washed the big shelf, dusted the stuff, and then reorganized everything on it.


I lowered the shelf Philip lives on. Now he's at my eye level, and isn't in the dark. I also hung my selvage bag below it because I wanted to show it off.


Then I cleaned my work tables, and I dusted everything. Then I sat down and took a good hard look around. What did I WANT to sew? Well, I wanted to finish the pink bird quilt, and I could see where I wanted to add more small birds. 


 To do that I needed to make a set of small bird legs, so I made several leg panels. 

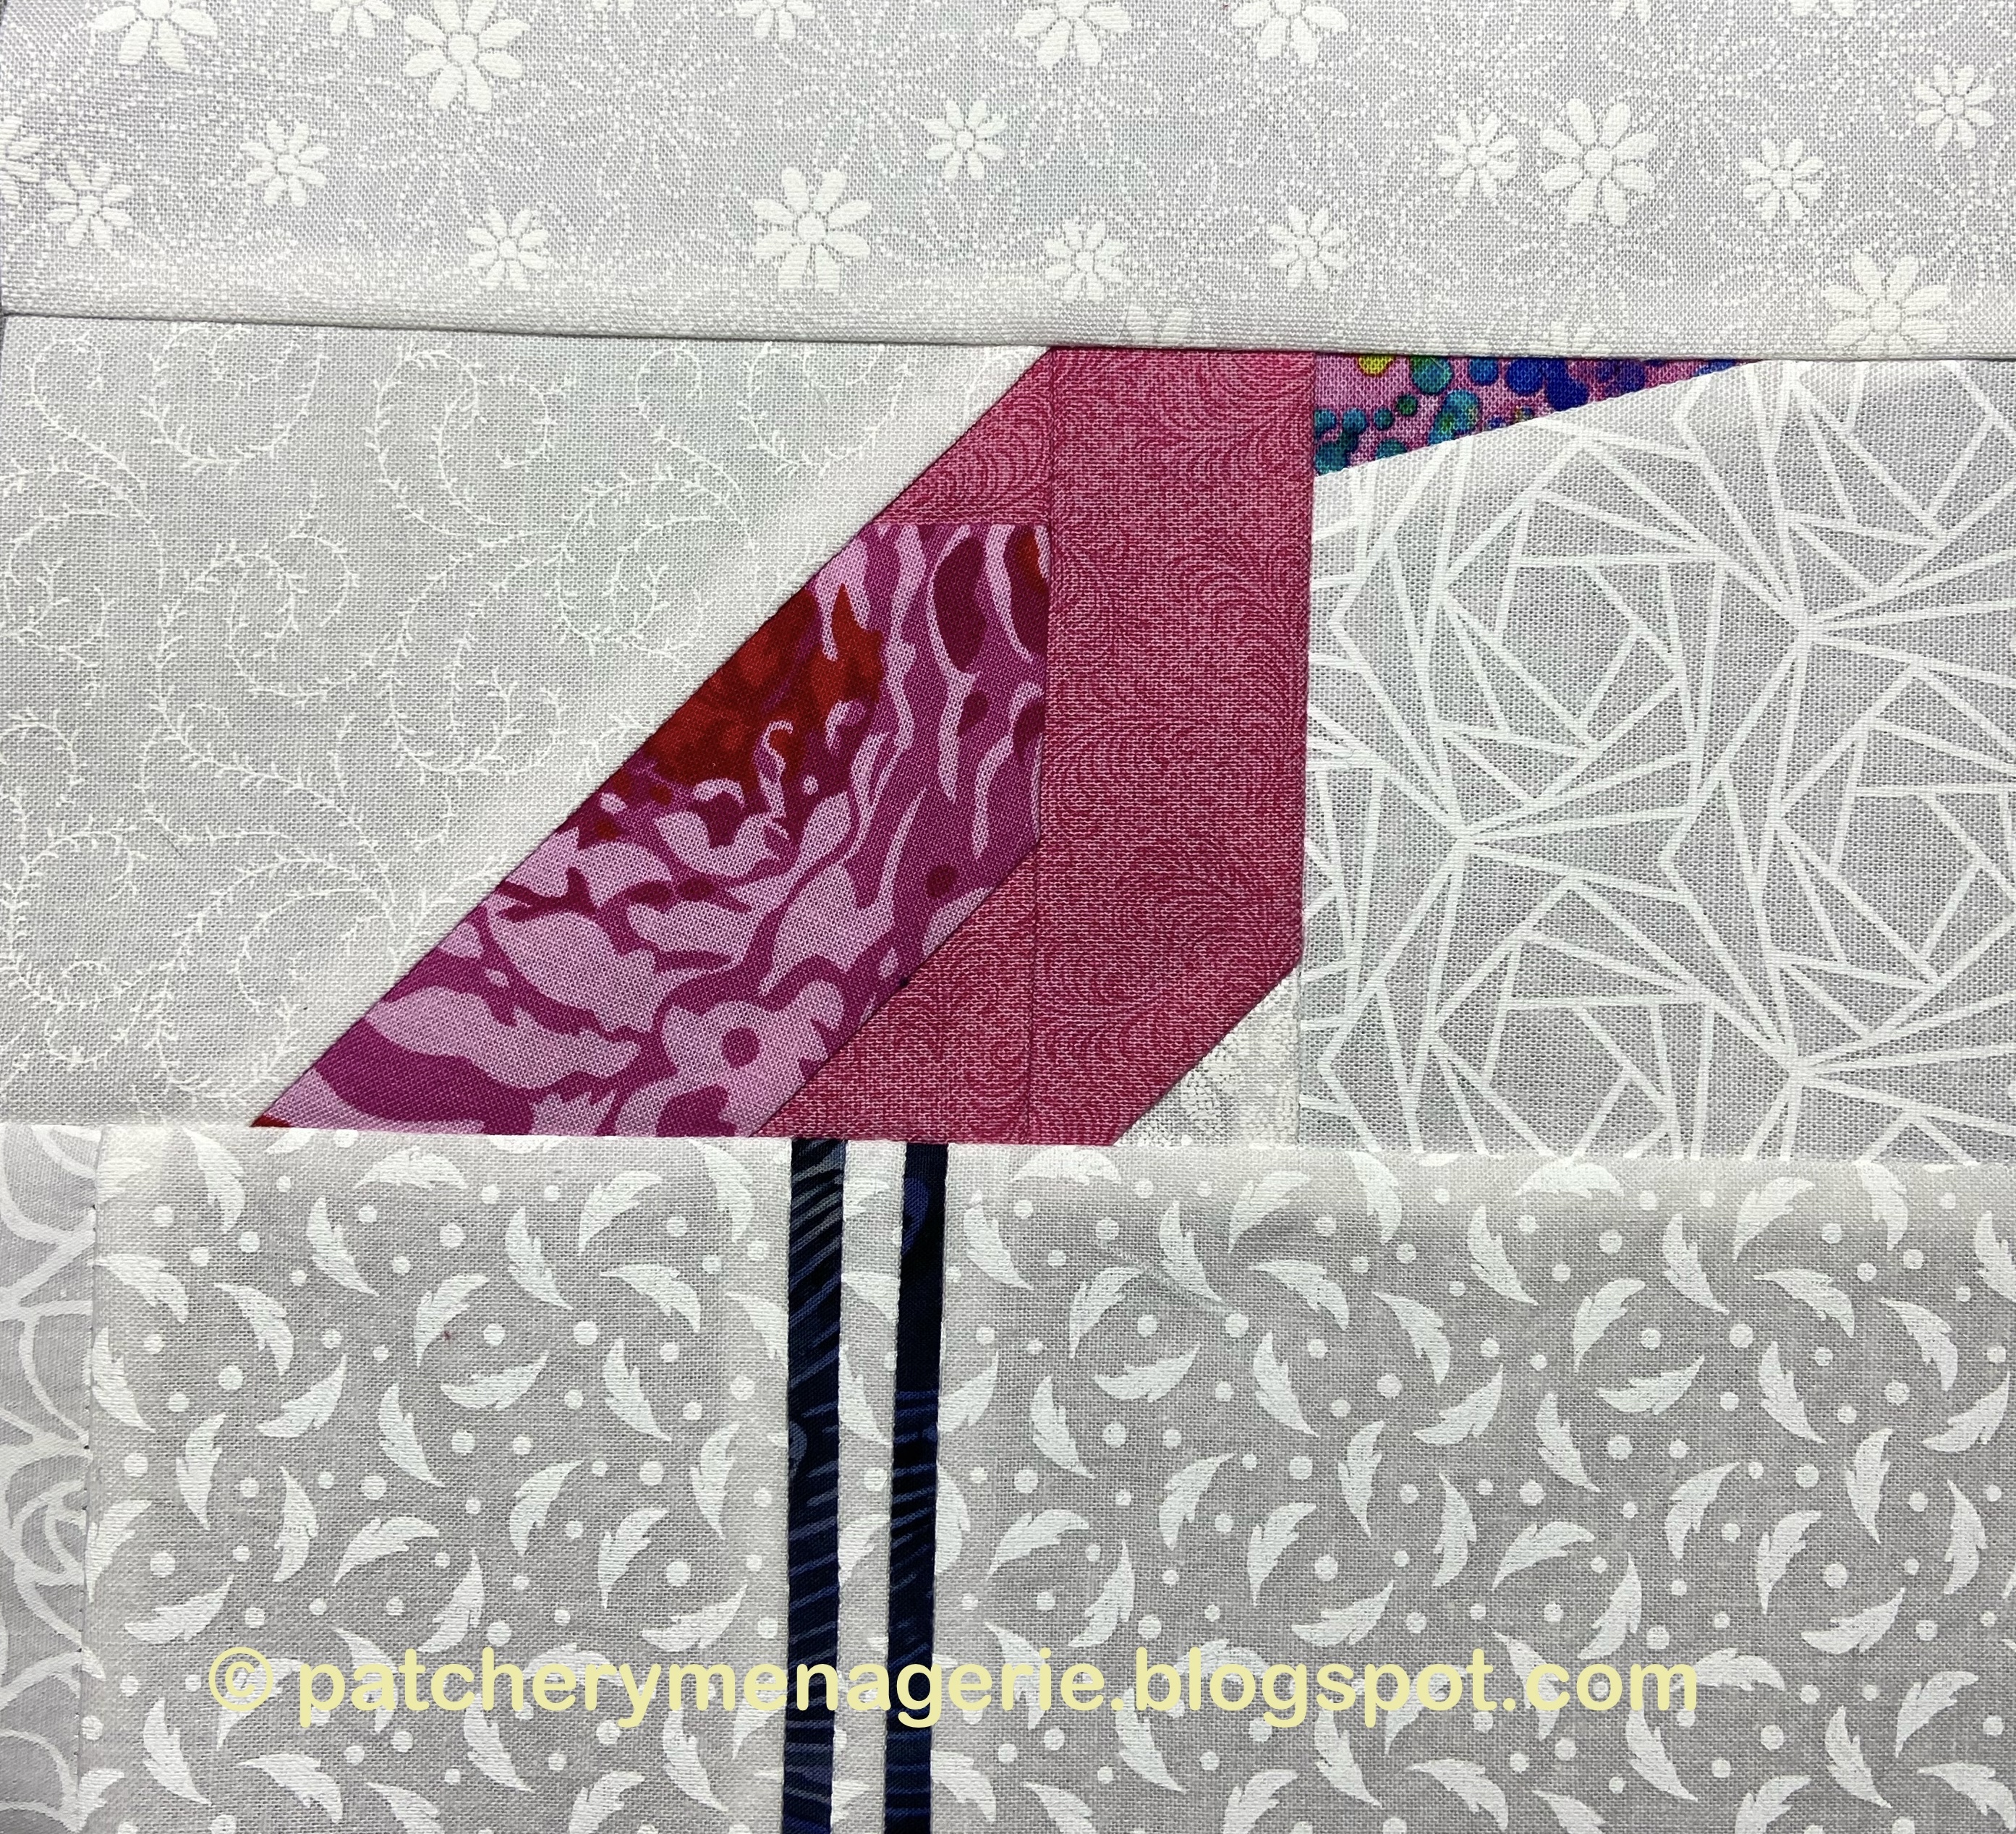
Then I made a small bird, although it's hard to tell. If you want to make one (or a few dozen, you can get my tutorial here, at my Etsy shop. It's an instant download, so you can get started right away.


Friday, January 27, 2023

Best Friend to the Rescue


 Now that the kitty condo is gone, there is no place for Philip to sit to watch over my studio. I didn't quite know what to do.

This is when it helps to have a best bud. My pal Julie (and my apologies, but I'm still trying to figure out how to post blogs with my new iPad and getting used to how Macs work, so links and watermarks are a bit beyond me just yet...) ANYWAY. it's always nice to have a good friend who knows when you need help and isn't afraid to jump right in and take over. 

Julie had some ideas, and sent me some links to narrow corner bookshelves for that corner, and when I said those wouldn't work because of the built in shelf across the bottom of the room, then sent me ideas for floating shelves.


I liked this one, and ordered it. It arrived after dinner last night, and I decided, what the hell, might as well put the sucker up. I gathered my tools and went into the studio, figured out where it should go. got out the drill and got to work


Four holes and four screws later, the shelf is in place, and Philip is back again on the job.


Yeah, I know it's dark, and it will look better in daylight, but hey, one problem solved!

Dearest Julie, have I told you lately how much I love you?


Monday, July 4, 2022

In & Out of the Studio


As regular readers know I am a huge tennis fan, I generally hand sew the binding down on my quilts while "watching" tv, and yesterday I watched the tennis at Wimbledon. I started sewing the binding on the Defying Gravity quilt. I got one of the short sides done. 

The Defying Gravity Quilt is a scrap slab quilt. You can get my tutorial here, at my Etsy shop.

My pal Julie spent a week with me last month. In between our travels all over the state we made scrap slabs. I let Julie loose on a couple of bins of scraps and she sorted them by color and made lots of slabs. Now she's making her own scrap slab quilts, and having a lot of fun. You should check them out.

I put my studio back together the way I had it before Julie visited.

Almost. I left the folding table where I put it when I set up my second sewing machine for Julie. There used to be two stools there, but I never used them so the went in the yard sale. The table will be more useful as a place to put my blocks when I am working on a quilt.


Monday, April 25, 2022

Getting Ready


I've been working to get the studio ready for Julie's visit in June. We talked about how I should arrange her work area. It meant I had to rearrange my studio.

I've set up a workspace for Julie at the end of the studio. We want to keep the recliner in the room so we will have a comfy place to sit and chat, so I had swapped it's place with my small work table.

In the far corner of the studio I have placed my small work table, raised so Julie can work standing up.

I set up my Bernina on the portable table against the far window. I will move my office chair for Julie to use while sewing. You can see Julie's bin under the worktable.

So now the room is pretty much ready. We are planning on doing a lot of sewing, We're planning a lot of stuff, including a trip to the Seacoast, and into Maine, since Julie has never been.


Thursday, April 14, 2022

Wednesday's Bird is a....


Wednesday's bird got preempted by a chair. I finally replaced it after putting up with my old broken one for at least a year or so. The other one was perfect in every way except from time to time and for no apparent reason or cause I could discern, it would suddenly start lowering itself and there I'd be, practically eye level with the tabletop, frustrated beyond belief.

I'd done some research online, but nothing can take the place of actually SITTING in a chair and feeling how it fits.

So Wednesday evening, after picking up my grocery order, I started into the lane that went home, but the lane that led to the big box office supply store was empty and I thought, what the hell, no time like the present.

So I drove over and parked and then sat in practically every office chair in the store. My requirements were these: mesh seat covers (much cooler), ability to remove the armrests, and that it felt OK.

Less than a half hour later the big box was in the back seat of my car. After dinner I put the sucker together. I need somebody with strong hands to loosen the big knob underneath so I can make the thing lean back, but otherwise it's good.

You know, those little things...

Monday, April 4, 2022

The Only Way Out is Through

 In dealing with grief, pretending it doesn't exist won't work. I just have to get through it, and the only way out is through. 

My pal Julie suggested I take a trip to Quilted Threads and surround myself with fabric. So I did. It was a great suggestion. I needed to get out of my head and my house, and I needed to be surrounded with things that could inspire me. After all, if you always do what you've always done, you'll always get what you've always got.

I ended up buying 20 yards of fabric, and - gasp - I actually bought 7 yards of something for which I have no plan!!! I bought some beautiful fabrics and they can work in three or four different combinations.

Making birds really soothes me, so I decided to make a pink bird. While I was making it I got the idea to make an entire quilt of PINK birds!! That made me really happy. I always think of pink as Millie's and my favorite color, so that got me excited too. I have a lot of fabric to clean up and organize, so while I clean that, I can take breaks whenever I see some exciting pinks and make a bird or two.

This gives me a good way to work my way through cleaning the studio that doesn't seem too much like work or drudgery.

This is another pinkish bird I made last month that I will add to my pink bird collection.

This is my ironing table, and while it doesn't look special, what it is is clean. In keeping with my goal this year of cleaning through every shelf, bin, drawer and box, I removed everything from the table, dusted and cleaned the tops of all the plastic bins, I dusted the shelf, and tightened all the screws. Then I moved it away from the wall and vacuumed underneath (it was a favorite warm weather napping spot of Millie's so the area was covered with her furs.) While at it I cleaned the walls behind it, and got rid of some junk I found hiding back there.


You too can make birds. Get my tutorial here at my Etsy shop. It's an instant download, so you can get started right away.


Tuesday, August 18, 2020

The Ironing Table

While my son was in college, we set up his room so he could have more space and privacy. My dad and I built an L-shaped desk, and put my son's bed in a loft. I painted it with cats and other fun designs. In the photo above he is playing with Gizzy, "the cat who came before."

When my son moved out, I wasted no time in taking the bed apart and setting the room up as a painting studio. Life had other plans for me, and I got back into making quilts. At some point I got frustrated with the standard ironing board. I had an idea to make an ironing table. I mentioned it to my sister at Christmas one year. (My sister has a love affair with power tools.) A quick trip to the basement where I had stored all the pieces and parts of the old bed confirmed I had enough wood. A few days later we got to work.

First we figured out how big the top should be. I guessed 48" long. The plywood we had was 24" wide, so that was that. Then we added an apron to the top, and then assembled a base. It's nothing fancy.  We did mark the front of the base and the top "FRONT" so when I remove the top I can put it back together properly.


We put a shelf at the bottom, mostly to stabilize the thing, and brought it up to the sewing studio.

I covered the table with two layers of cotton batting, and a layer of "Insul-brite" which is a kind of batting with a heat layer, designed to be used in potholders


A trip to the local fabric store yielded a couple of yards of that silver ironing board fabric. I stapled it in place using an electric staple gun.


 By that time I was aware of ergonomics. We determined how high the table would be my figuring out how many inches from the floor the faceplate of my iron was when I held it with my elbow bent at at 90 degree angle with my shoulder relaxed. I'm five feet tall. The height is 32-1/2". It's perfect for me, but if you're taller, make it taller.

In retrospect, I should have made the table wider, about 54". Why? Because although the table at 48" wide is plenty wide enough for a piece of 42-44" fabric, it is not quite wide enough to set an iron on it while shifting the fabric. I've solved that problem by setting an end table to one side, covered with a plastic placemat, where the iron rests along with a spray bottle and a measuring cup for water. (I use steam.) Still though, this is a thousand times better than any alternative. You can buy a "handy panel" of plywood at the average big box hardware store that's precut to 24" x 48" for short money.

Since I built this in 2007 I've recovered it four times. (That works out to every three years.) The first time I replaced the silver ironing board fabric I also added another layer of cotton batting and insulbrite. Oh, and make sure the top is stretched TIGHT! Wrinkles in the top make your work harder.

I use the ironing board cover fabric because it is designed for heat and there is no "drag." In other words, it's easy to use, because it is "slippery", it is not tiring to use when ironing quilt backing. Ordinary cotton looks great, but with all the heat, it burns eventually, and then dries and cracks, and then tears. It would work, but would have to be replaced more frequently.

There are a couple of other considerations. Your ironing table should NOT be placed right up against a wall, and there should be space all around for the extra fabric to fall over the edges. Let's face it, if you are ironing a six yard piece of fabric, you only want to do it ONCE! You will also need an electrical outlet close by for your iron (mine has a very long cord. I find the cordless ones don't get hot enough.) and for a light that should be placed above your ironing table so you can see what you are doing. And since ironing (or pressing or whatever) is done standing up, one of those comfort mats for standing on is a really nice addition. Your back, and your feet, will thank you.

This is a simple thing, but well worth the small investment in time and effort.


Saturday, March 14, 2020

Keeping Occupied

Gosh it's been a scary couple of days. I did a lot of work in the studio getting it ready for the next big project. I'll be working on the Zebras tutorial just as soon as I finish getting the backing ready for the Partly Sunny quilt. Although I may take a small side trip and prepare tutorials on the Asterisk flowers and the Seminole Dots. Lord knows we need something positive to keep ourselves occupied.

Here is my quarantine stock. I can't tell you how glad I am that I got this done last week. When I was at the grocery store after work last night I was shocked to see so many empty shelves. No bananas, spaghetti sauce, pasta, rice, canned meat of all kinds, no beans, no canned or frozen vegetables, hardly any butter or eggs, no bread, no toilet paper or facial tissues. Cold medicines, pain killers and other drugs were in short supply.

OK, back to the good stuff. I'm going to make a blue Jealousy quilt as the how-to for the zebras tutorial. Here are the blues I pulled from my stash. I also have more fabric on order. This will be exciting.

Saturday, October 26, 2019

Tricksy!

When you've done as much fussy-cutting as I have, you learn a few tricks.  See the pair of blocks just above the watermark? See how one edge of the block on the left has a dark line running along the edge? You might think, hey, that interrupts the flow from one block to the next, but actually that line will disappear because it is inside the seam allowance. The pink center in the upper left of that same block will also disappear into the seam allowance.

See the block in the center of the group above? You can probably tell already because I am so close, but...

I've got the wrong side facing up. The block was just too bright where it needed to go, so I flipped it over. From a couple of feet away, you can't even tell.

I will fussy cut anything to get the look I want. This fabric had a lovely very light green I needed, but I didn't need all the extra colors with it.

 I cut two squares of the fabric, and believe it or not, the slightly busier one worked better. That bright pink spot in the upper left corner will also go away because it is in the seam allowance.

 I worked hard to get the tables clean and the fabrics mostly put away.

Because I really want to get the binding on the Golden Zebras quilt.

BUT HOLD THAT THOUGHT!!!


You may have noticed all the green fabrics all over the studio the last few days. On the tables, on the floor... everywhere. I had washed them, but not ironed them. Most of them came from Gail, who sent me a gigantic box of yellows and greens last year when I was working on my Early Autumn quilt. The box really saved my bacon when I was working on the colorwash quilt.

I was ironing this last two yard piece when I thought, Damn, I've got a lot of greens. I should make a green Zebras quilt... Then that thought hit me and I thought, "OH HELL! I SHOULD MAKE A GREEN ZEBRAS QUILT." That sentence finished in my head and I thought, I should call it JEALOUSY.  Then I had a better idea... The Green-Eyed Monster. (Which of course is the same thing.) I think I am going to have some serious fun with this. The greens are bright, and I have no plan on toning them down.

Heh!


Friday, October 25, 2019

Lies, Lies, Lies!

You really didn't think I could keep my fingers off this thing, did you?

Well, I didn't. I have been tinkering. I tried to make the outside rows look less like dark borders and allow the color on the edges to bump out a bit. I tried to make the corners less like blobs. I have some flat spots, and not as many lively fabrics as I perhaps ought to, but I am good with this. (Yeah, I know, I've only been saying that for the last two weeks.)

This is the view from my cutting table. I have started cleaning up a bit. This also gives you an idea of the scale of the colorwash. It is 20 rows of 2-1/2" squares, so right now it is 50" across, but when it is sewn together it will be 40" square.

The sewing machine table is clear as is my ironing table. As you can see I've got fabric all over the place. I have something like three quilts to bind, but I have to have room to cut strips and pin the binding to the quilt, so I have to clean up. Plus I hate it messy.

By the way, Gail of the boxes of fabric, your green and yellow box of fabrics saved my butt on the colorwash quilt. Have I told you lately how much I love you?