Showing posts with label Nightingale tutorial. Show all posts

Wednesday, September 9, 2026

A Collection of Riches


I picked up three quilts from my longer quilter, Janet-Lee Santeusanio, the other day. This is Dancing Jewels, for my nephew. I'm happy with it, and will be working to finish it up for him ASAP.

I also picked up another quilt that doesn't have a name yet. I've been referring to is as the Jewel-toned Macnas quilt.

Here's another photo. This quilt has a home, so I'll be working on this one after I finish the one for my nephew.

The third quilt I picked up is the third Nightingale*** quilt. The first two of these flew out of my studio pretty quickly so it's nice to have this one to myself.

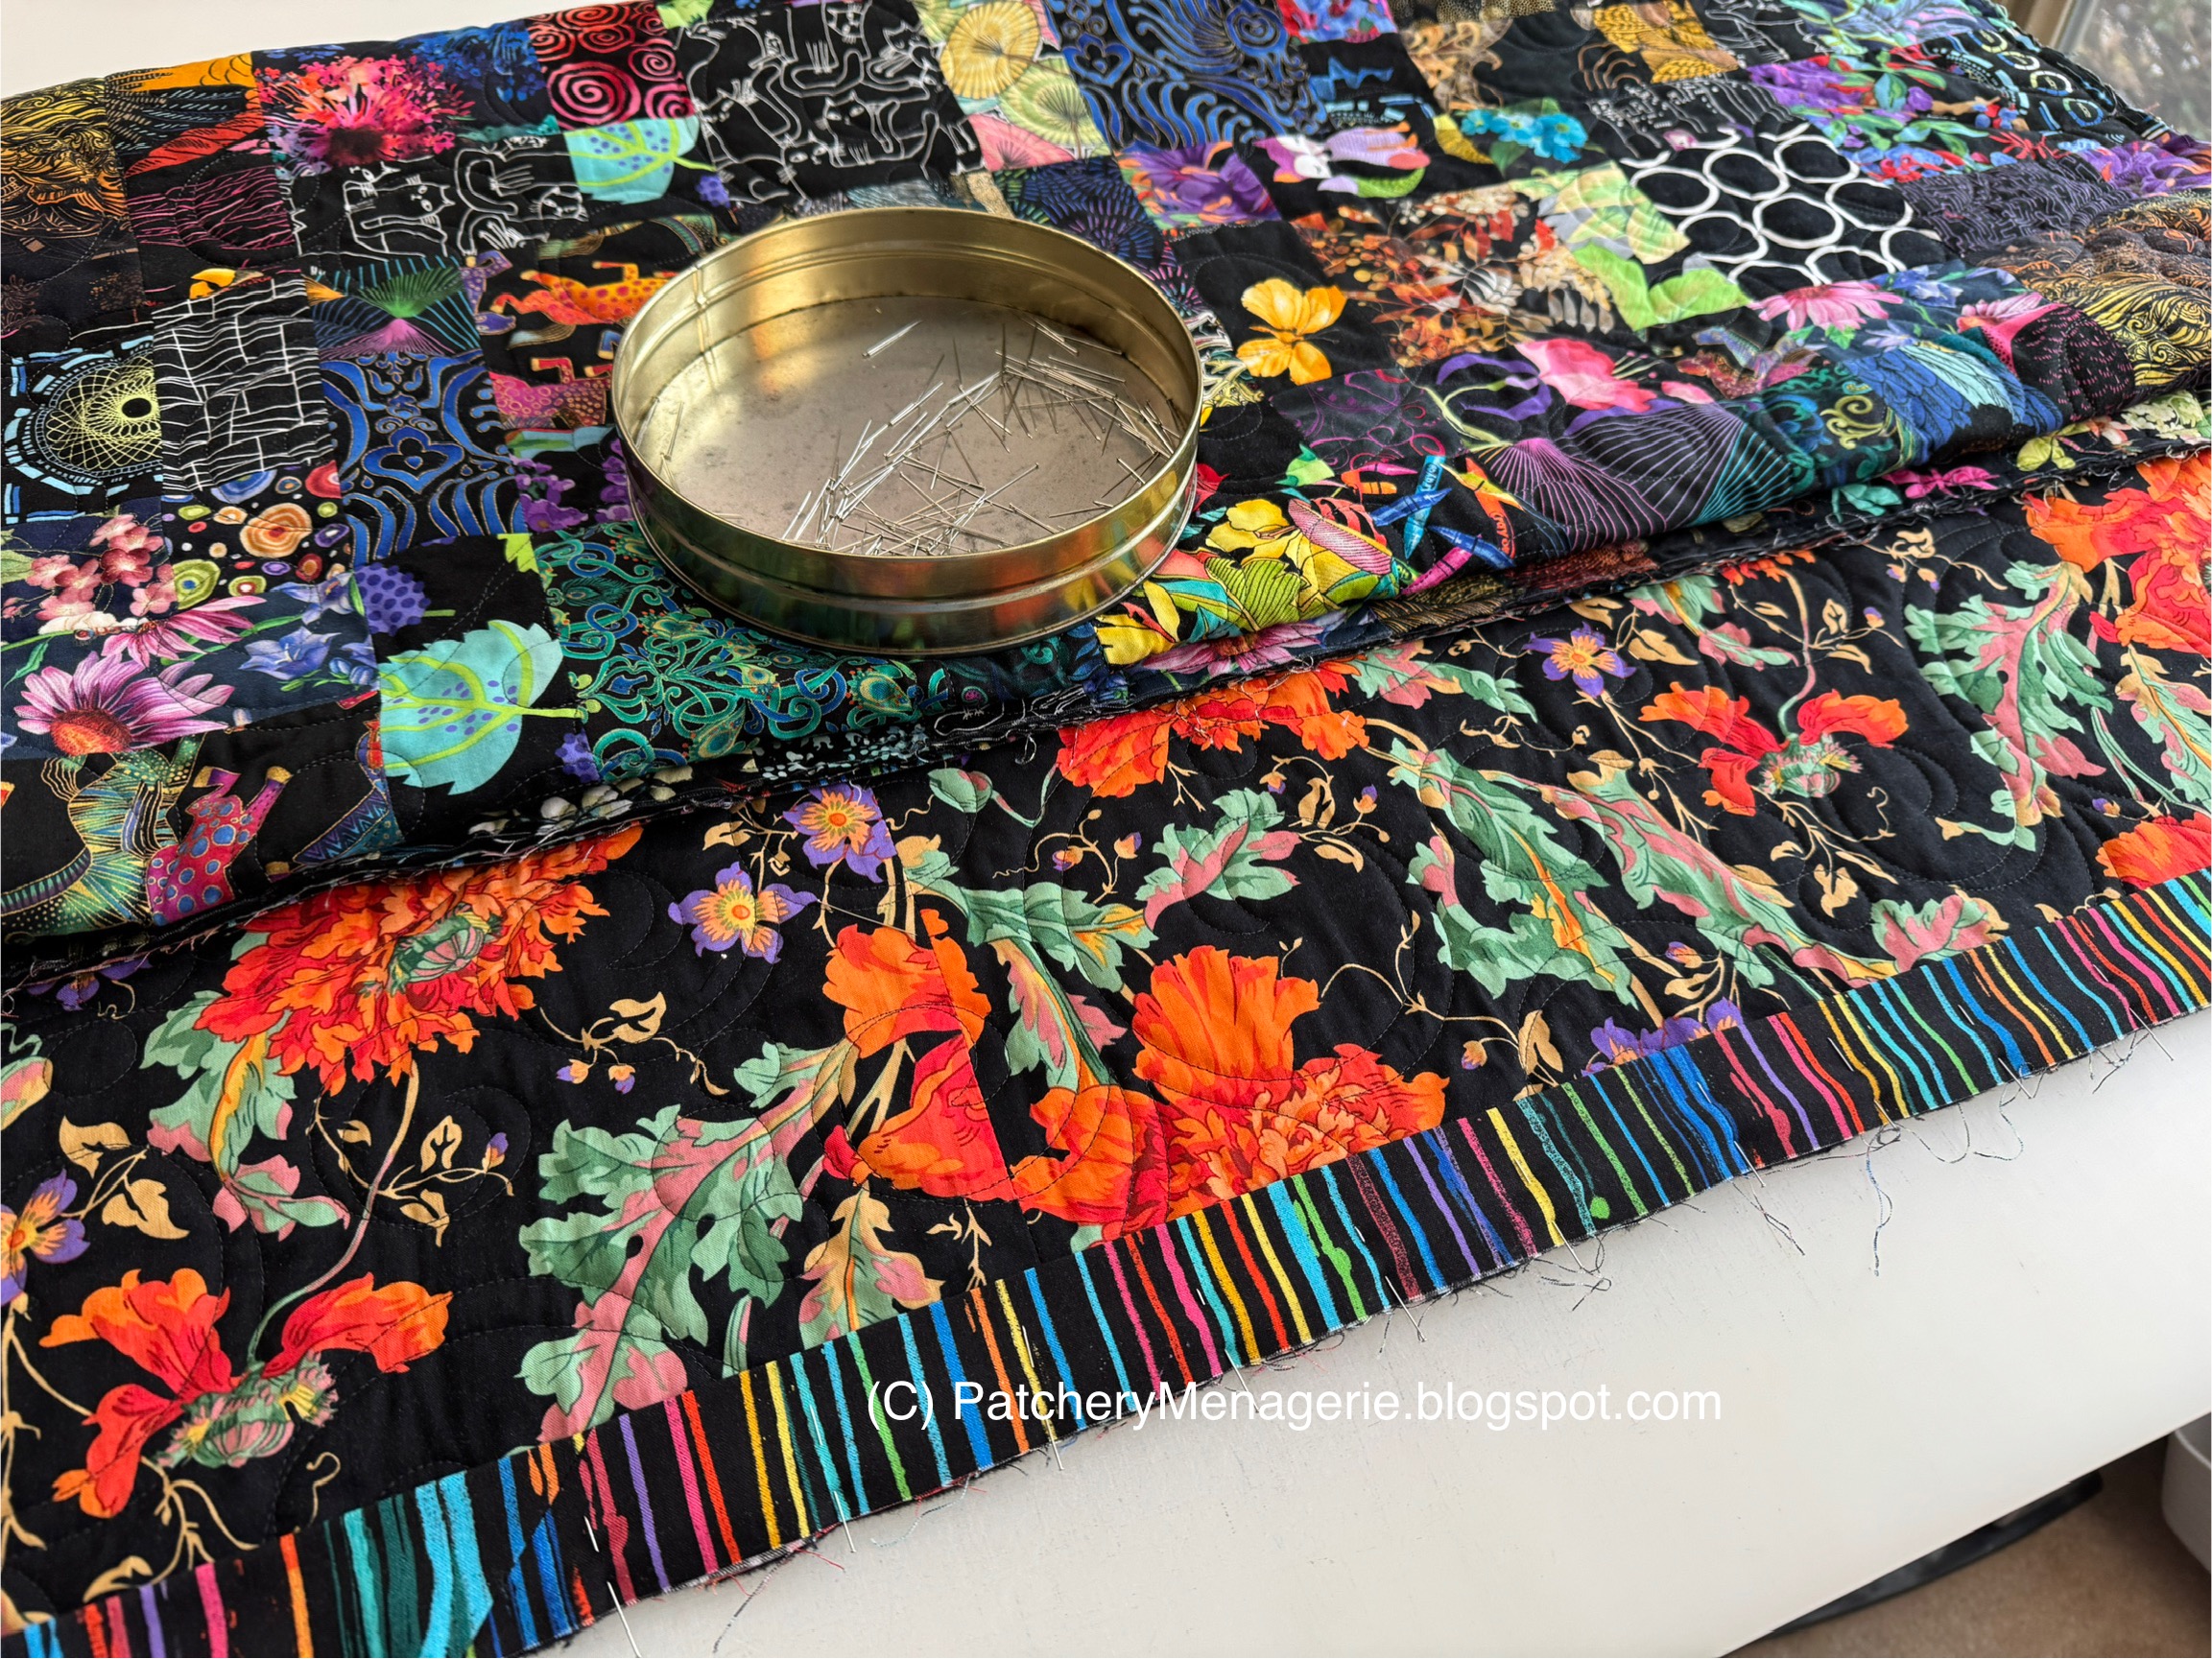
This photo of a small section of the back of the quilt may show the quilting better.

I have always loved brightly patterned fabrics on a black background, and since I believe if you are going to "go for it" you should really GO, I have picked equally vibrant prints for the back of this quilt. I also like to use panels on the backs of my quilts.

I was giving a talk to a quilt guild once and a lady came up to me afterwards and said, "You like busy backs." I looked at her and said, "Mostly, I hate boring ones." 

This reminds me of something some art critic or historian (I can't remember which) said of the artist and illustrator Alphonse Mucha: "...he doesn't like empty space." 

Apparently, neither do I.


***This quilt is really easy to make, and you can get the tutorial here, at my Etsy shop. While I think it is pretty spectacular made with bright colors on a black background, you can of course make it any color or colors you want. You can see it in green here, And made from bright prints on a white background here.


Friday, July 3, 2026

Field of Dreams is Finished!


I tied all the knots on the Field of Dreams quilt, then trimmed down the excess backing, folded it over and pinned it down.

Then I machine stitched the binding in place.

(Look at my empty studio!)


The quilt is 78" x 98" or so, and it's already on its way to the City of Angles. It should arrive on Monday.

Woo hoo!


This is a Nightingale quilt, just in greens. If you want to make one, you can get the tutorial here, at my Etsy shop. It's an instant download, so you can get started right away.


Sunday, June 28, 2026

Left over Right, Right over Left...


I am tying the Field of Dreams quilt with crochet cotton. I use a needle with a big eye and a sharp point. I am tying the quilt at the corners and center of each block. First I do the corners, going. up and down the rows.

I have a little pair of scissors that are designed to remove stitches (in people), so the bottom edge can slide under the thread and not risk cutting the quilt underneath. I cut all the threads.

Next I tie the knots. Square knots. Left over right, right over left. I pull the threads to one side. 


When I'm done tying all the knots, I go back and grab the threads and trim them. Then I go back and do the centers of the blocks. This way I have threads long enough to grasp comfortably to tie the knows.


This is the color of the crochet cotton I'm using, and if you can't see the knots in the photos above, then that's a good thing. It means I picked the right color. I've got about three quarters of one half the quilt done. This is rough work for my hands, so I do it in smallish doses.  


When I was much younger I used to do this with the quilt spread out on the floor.

Not anymore!


This is a Nightingale quilt, in all greens. It is one of the easiest quilts you will ever make, and it is fat quarter friendly. You can get the tutorial here.


Friday, June 26, 2026

Needs Must


I finished sewing together the Field of Dreams flimsy. The thing is enormous. I didn't know how I was going to lay out the backing and place the top on it without moving any furniture in my house.

But I had an idea. I knew a place that was big enough, and empty enough, and had a nice clean floor. I made a call. The answer was yes.

Later, after my Tai Chi Quan class ended, I unfolded the back of the quilt, and taped it to the very slippery floor of Studio C at the YMCA in my town. With the help of the instructor and another student, we placed the quilt atop the backing and centered it.

Both the instructor and the other student couldn't get over it and kept complimenting me on how beautiful it was. They laughed as they pointed out fabrics they liked. "Look at those pretty flowers!" "Oh how cute, there are dinosaurs..." My instructor asked me how long it had taken me to make it, and were shocked when I told them less than three weeks.

They left and I got down on my hands and knees and used safety pins to secure the top to the backing at regular intervals. After about half an hour I folded it up and brought it home. I'll work on tying the two layers together over the next couple of days, then I'll fold over the excess backing and sew it down. I expect to have this in the mail early next week.

The folks at the Y were more than happy to allow me to do this between classes in that studio. Sometimes the answer to a thorny question is easy and nearby, you just have to ask.


Thursday, June 25, 2026

Field Of Dreams Grows


This is the top half of the Field of Dreams quilt I am making for my son and DIL.


The parts on the floor in the top photo are represented by the dark area in the diagram above. It's getting closer and I am getting excited.

Because this quilt is so wide and I decided not to use a wide quilt backing fabric, I needed to add a strip of leftover blocks down the middle of the back.

I like it. You can see I included some Dino fabrics from my DGD's quilt.

I got some green crochet cotton for tying the quilt. My goal is to have this finished and on the way to the City of Angels before work on the studio floor starts.


The Field of Dreams quilt is a Nightingale quilt, it's just green. You can make one too. It's super easy. You can get my tutorial here, at my Etsy shop. It's an instant download so you can get started right away. It's fat quarter friendly, too!


Monday, June 15, 2026

Field of Dreams Progress


This is the diagram I am using to keep track of how many blocks there are in the green Field of Dreams quilt. I told my son and DIL that I would mark this diagram and send them a photo so they would know my progress on their quilt.

These are the blocks on my design wall. It isn't big enough to lay out the real blocks the same way as my diagram, but these are the blocks I have made so far, and you can see where this quilt is going.

Sorry the lighting is terrible, I've packed away the lights I use to illuminate the design wall. It's getting there, and it won't take long.


Thursday, June 11, 2026

What Else....

 I've told you all that I'm working on a quilt for my son and DIL, but as I will be having the floor in the studio replaced in the next few weeks, I'm also going through everything in the studio to determine whether I want to keep it or not, and clean everything that's left.

This is the top of one of the small bookcases, Notice the dust!

I cleaned everything, the mugs, the items in them, and put it all back. Notice I put all the buttons I found as I cleaned into one of the jars I had kept.

I cleaned these two taborets and sorted through everything in them. I got rid of a big bag of sewing notions: zippers, findings, ribbons, trims, buttons and other stuff, then resorted the stuff I had stored in them, and labelled everything. (Ergo buttons in a new jar.)

I figured cleaning out this bookcase would be easy, but it wasn't. I have quilting books from when I first started making quilts, over 50 years ago. Th ere were a lot of memories in those books.

Sorting through them was tough, and I didn't keep all of them. I more or less sorted them into "historical" and "how-to" and put the ones I look at most often together. I also moved printed copies of my tutorials to this bookshelf, as they seemed to belong there.

Anyway, I've got all the stuff clean. Now I have to sort through the fabric in the bins and decide if I want to keep it. 


I've been alternating between working ON the studio and IN the studio. 

I have all the strip pairs sewn together for the Field of Dreams quilt. So that's moving along as well.


Friday, June 5, 2026

Party Animal

I was going to name the White Nightingale quilt "Mourning Dove" but I was talking to my friend  Susan and she said the quilt was way too happy and cheerful. "It's a party," she said. "It's a party animal."

I liked that idea, so the quilt is now named Party Animal.


I've told you that I plan to make this quilt the way my grandmother made us quilts, and that means no batting and no quilting. I will tie the quilt with white crochet cotton.

I used a needle with a big eye, and tied the quilt in the corners of each block. 
.
It's a square knot. I thread the quilt in the corners, working from one block to the next, then I cut the ties in the middle, then tie the knots, gathering the excess to one side and move to the next knot. When I've got them all tied, I go back and trim the excess threads.
.
There is no binding.I trim the backing to four inches wide, fold it to the edge of the quilt, and then fold it again. up to a predetermined width, then pin it in place.
.
I mitered the corners.
.
Then I machine sewed it in place. After that, I ironed the quilt. (What a concept!)
.

Here is the finished quilt. Later I will run it through the washer and dryer. Since the ties are 100% cotton, they will shrink, making the knots permanent.

Later this weekend, when I change the sheets on my bed, I will put this quilt on the bed, on top of the top sheet and underneath the summer blanket, and the only person who will ever see it is me.

When I was growing up, we brought these quilts to the beach, to the lake, to the fireworks. They were great at the beach because they were so cool (literally) to lie upon. They were utilitarian quilts, and they were made from scraps. We never considered them fussy. If we spilled drinks or food on them nobody got upset. The quilt would just get tossed in the wash when we got home. 

So the Party Animal is going to live a pretty quiet life, in spite of the name. It will NOT be going to the beach, or to the lake or to the fireworks.


Saturday, May 23, 2026

White Nightingale


The White Nightingale quilt is now a flimsy. Here it is on my front porch.  It's really pretty and cheerful.

There is a tutorial for the quilt here, on my Etsy shop. I've said it before, it's one of the easiest quilts you will ever make.


You can also see one of Chuck Hayes's flower sculptures. I got mine from Cherie last year. Her father makes sculptures using leftover scrap metal. You can read more about him here.

Friday, May 15, 2026

More White Blocks


After I made all the components I sewed the first batch of blocks together and threw them up on the design wall. It looks about like I thought it would. 

After another power sewing session I had enough blocks to cover the design wall. Again, these are not rearranged in any way.

I've decided I want this quilt to function exactly the same way the original black one does - tied but not filled with batting - and living above the top sheet on my bed and underneath the blanket. To that end it needs to be large enough to cover a double bed mattress and be long enough to tuck under the mattress at one end, so I'll be making this (and it's okay, you can laugh at me) 72" x 90".

When I made the original black quilt I made panels that were 24" wide by however tall I liked. Then I arranged them and sewed them into long columns. and then together into the quilt. Here I have decided to make them 18" square, or 3 x 3 blocks. That way I can arrange them in five rows by four to get the size I want. So I have been making these larger 3 x 3 "panels."

So far I have made nine of these, and again, here they are just on the design wall. I'll rearrange them later.

I think this will look really good with white sheets, and it will be summery.

Saturday, July 12, 2025

The Second Nightingale


The second Nightingale quilt is back from the longarm quilter and has had the binding added and is now complete. This one has a home and it will be going there soon.

It's bound with bright dots on a black background.

I know it's "black" but it's amazing how bright it really is! This is the easiest quilt to make - you just need a wide variety of brightly patterned fabrics on a black background. You can get my tutorial here, at my Etsy shop.


I'll be speaking and giving a workshop at the Connecticut Piecemakers Quilt Guild on September 8 and 9th this year in Trumbull CT. This particular meeting of the guild is open to visitors so if you are nearby, come on down!

Monday, January 13, 2025

A Pair of Nightingales


This is Susan B's Nightingale quilt. Susan is the quilter who strongly encouraged me to write a tutorial for this quilt, and then admitted that you could probably be blind and still make a successful Nightingale quilt. (That means anybody can do it.) I think she has done a spectacular job. 

If you have made a Nightingale quilt, I'd love to see it. You can email me at PatcheryMenagerie AT gmail DOT com. (you know how to put them together properly)

This is my first Nightingale quilt. I have been waiting for the weather to warm up and for the sun to come out so I could photograph mine, and it kinda sorta did that yesterday (although it was still pretty windy.)

This particular quilt has a home already, and when it has been gifted I will tell you the story.

My Mother has laid claim to the second Nightingale quilt. Gee, what a surprise! (She loves ALL my quilts.)


If you want to make a Nightingale quilt of your own, you can get my tutorial here.


Wednesday, January 1, 2025

Binding the Nightingale... and Real Life

I've chosen this brightly colored striped fabric for the binding of the Nightingale quilt.  (You can get the tutorial here.)

I've added the binding to it.

And now I'm hand sewing it down.


So that's the quilty side of things. Two days after Christmas my mom's boyfriend called me (remember she is 91 and he is almost 89) to tell me he was having stomach cramps and his doctor's office told him to go the ER. He wanted me to go over and stay with my Mom, who is a bit unsteady on her feet.

I threw some clothes on, grabbed ingredients so I could make some soup for lunch, and drove right over.

We all know how slow getting through the ER can be, and this was no difference. He was not seen until nine hours later, when it was discovered he had a kink in his colon, and needed a procedure to unkink it. They gave him the procedure and kept him overnight.

I slept in the guest room.

The next morning we discovered he would need surgery to fix it and they wanted to keep him a few days.

My sister came over to replace me, and his daughter came up a day or two later. On Monday the hospital discharged him, but his surgery has been scheduled for next week. The thing is, the surgery is a Very Big Deal and being almost 89, it's an even bigger deal with at least a week's recovery. Which means that during that time my mother's caregiver will need a caregiver and she can't do it.

Which prompted my brothers to ask what would happen to Mom if the awful awful happened to her boyfriend.

So it's been a challenging few days and that's what's been keeping me from blogging.

Happy New Year 2025!


Saturday, December 21, 2024

Nightingales by Lynne & Susan


The first Nightingale quilt has been quilted. It's hard to see in this picture - I will try again later tomorrow when there is more light outside. 

Here's the quilting from the back of the quilt. Janet-Lee used a black batting in this quilt. I didn't even KNOW there was such a thing as a black batting, but I'm glad there is!

This is Susan's Nightingale quilt. It's also beautiful, but so different! It makes sense. I think each quilter's Nightingale quilt will be different from anyone else's. It's because each person's fabric choices will reflect themselves. That's what I think makes this quilt so exciting. Susan's quilt has been quilted and I am waiting for her to send photos.


If you want to make a Nightingale Quilt, you can get my tutorial here, at my Etsy shop. It's an instant download, so you can get started right away.