
Showing posts with label letters. Show all posts
Showing posts with label letters. Show all posts
Tuesday, July 1, 2025
Lynne's Liberated Letters Class
Sunday, December 31, 2023
Not Paper Pieced is Finished

The Not Paper Pieced quilt is finished. I sat down on Saturday morning, and started sewing. I had found a really silly television show to stream - Holey Moley - about extreme miniature golf. Think miniature golf meets Wipeout, with crazy ridiculous trick miniature golf holes with near impossible tricks. It was just the kind of mindless thing I needed. I worked steadily, taking breaks to have lunch and strip the bed, throw the sheets in the washer, then the dryer, then remake the bed, then have a snack, then make dinner. So I watched ten episodes of season one.

Happy New Year's Eve!
Thursday, December 14, 2023
Motto
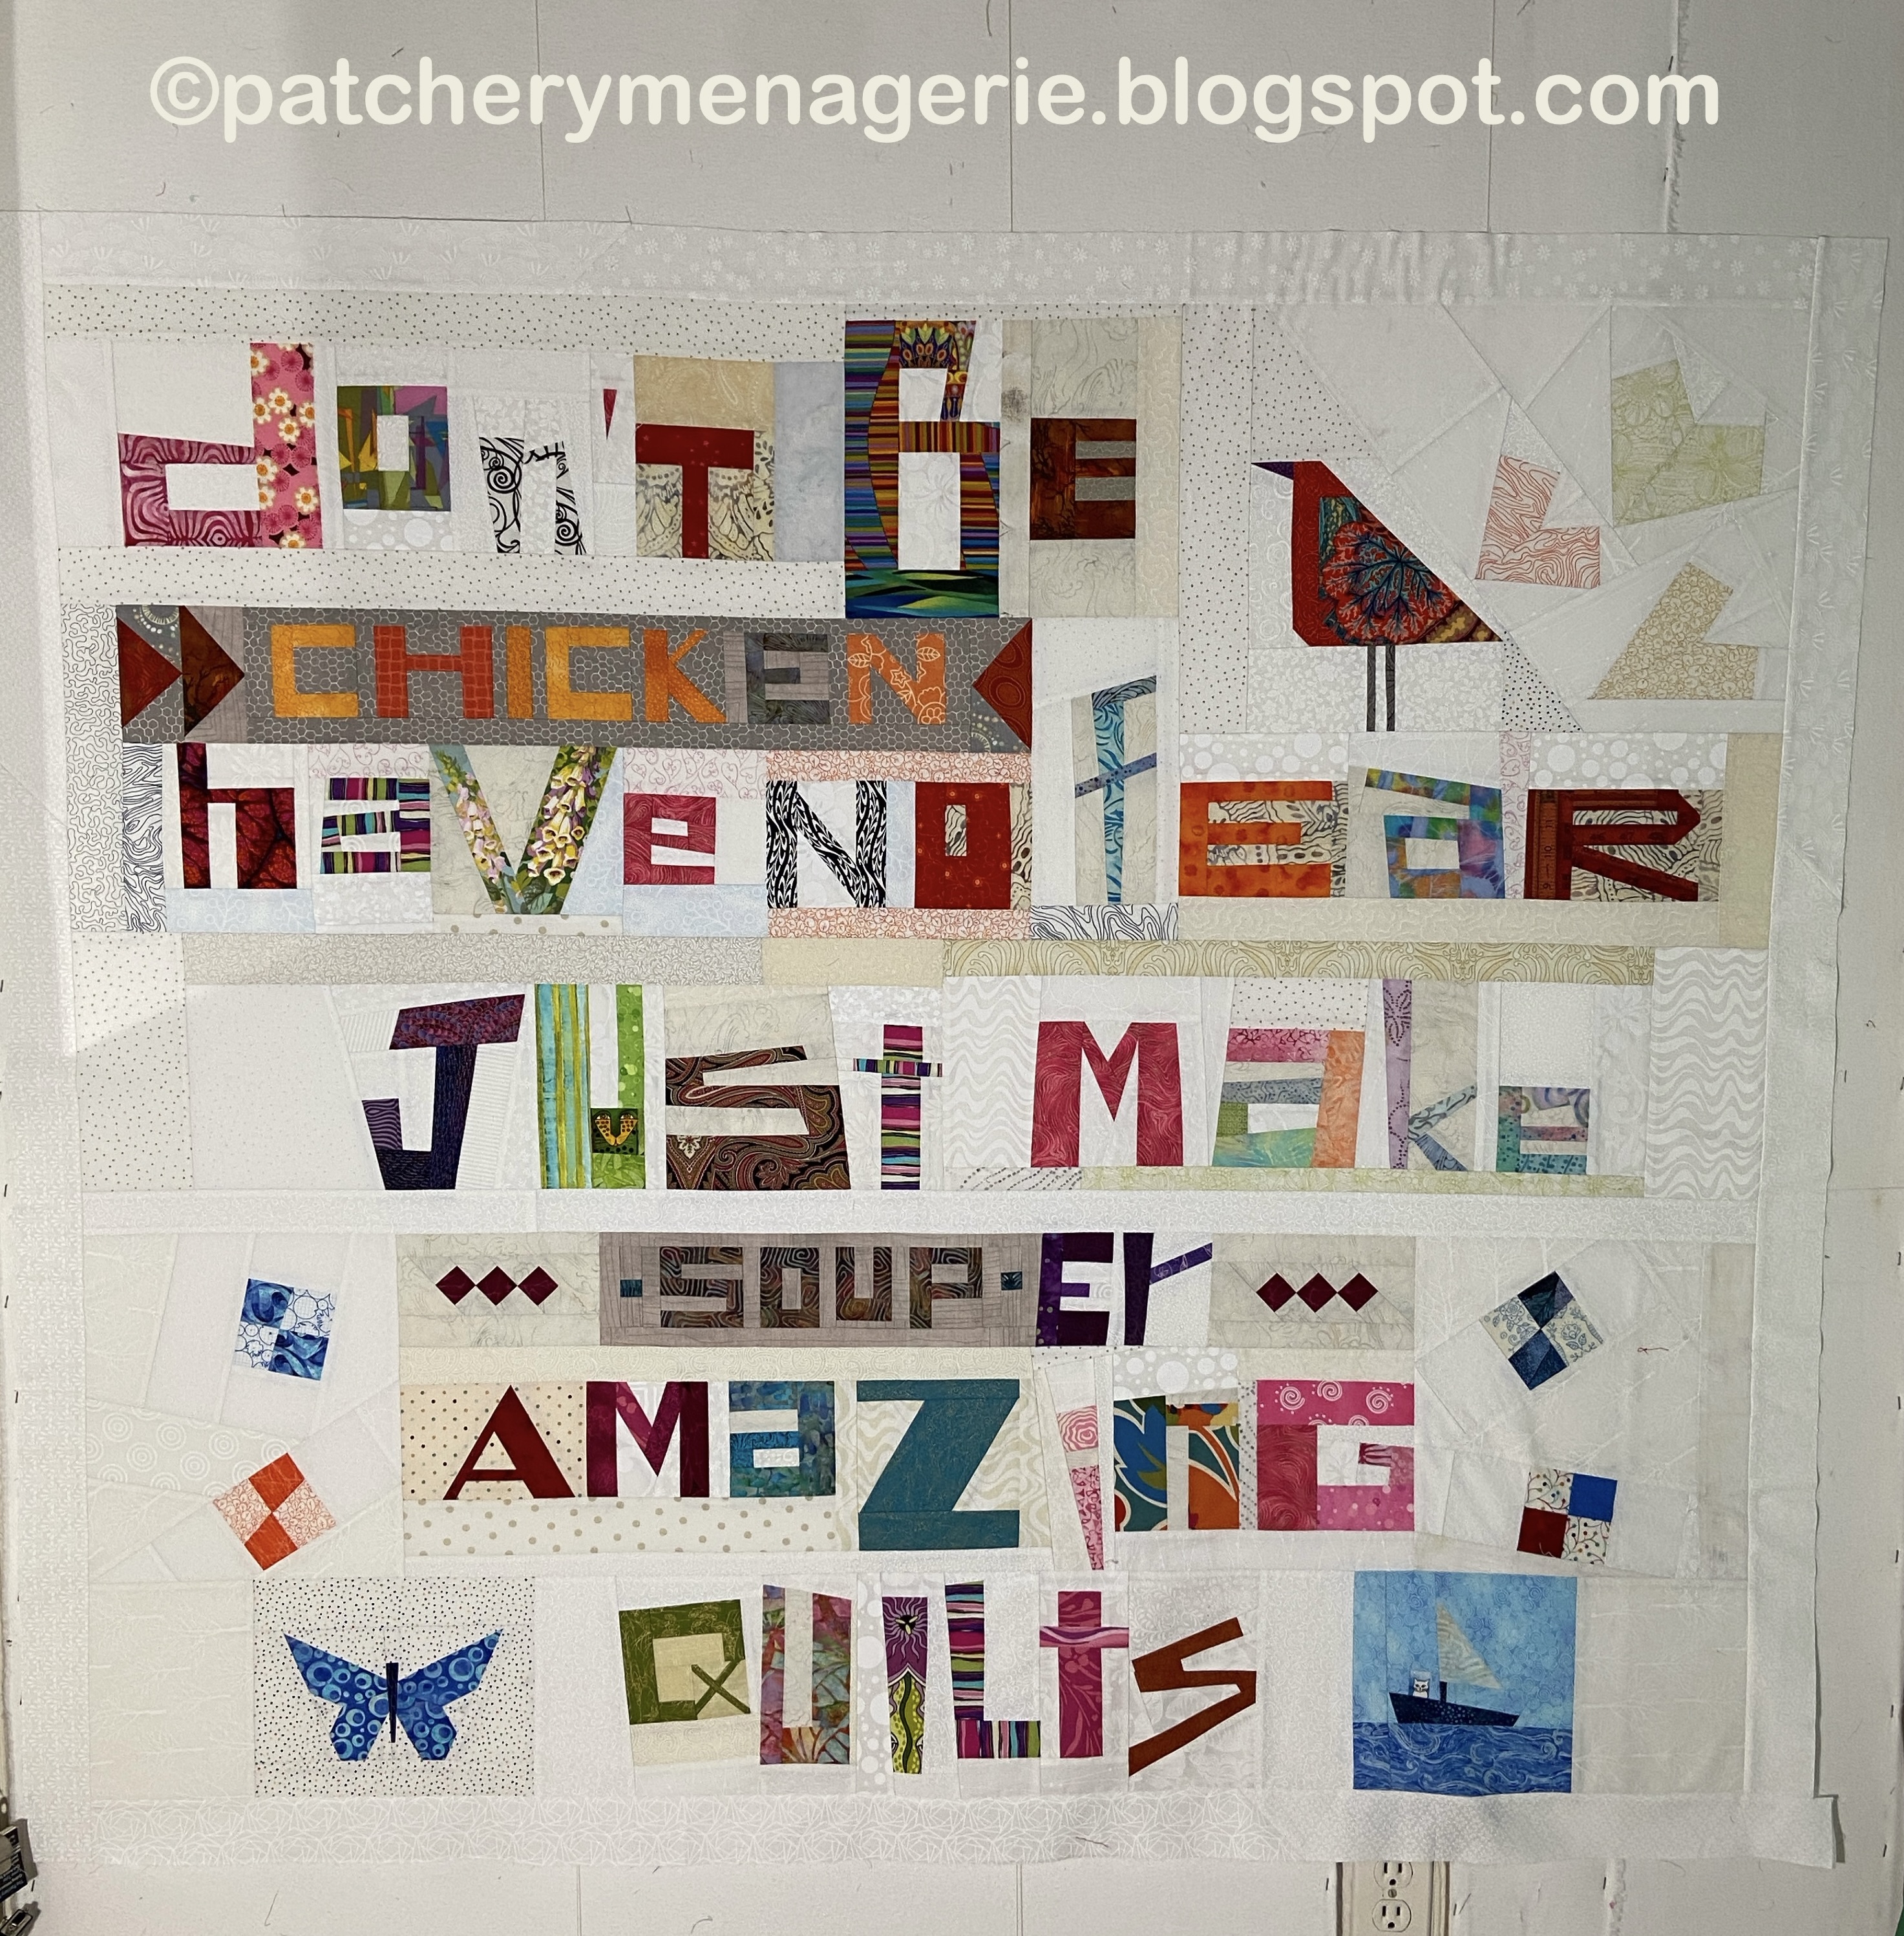
And two, I flip this over to show how the back of my quilts look. (I forgot to take a photo of it before I put it on the design wall, so the back of Not Paper Pieced will have to do for now...)

So "Don't be chicken; have no fear; just make super amazing quilts" yeah, that's a good motto for me.
Or anybody, really.
PS Happy Birthday Mary!
Monday, October 16, 2023
Letters
I was talking to my pal Julie on Friday in one of our marathon monthly telephone calls. We talked about letters and somehow I got the idea to make KEEP IT SIMPLE in free pieced letters.

Why KEEP IT SIMPLE ? Because we have both noticed that my best quilt are quilts that I don't think too much about when I am making them.

This was my first one.
I wrote a tutorial on "liberated" letters. You can get it here at my Etsy shop. Yes, it's a big tutorial, but I tell you everything you need to know to make all the letters in the alphabet in upper and lower case, as well as all the numbers.
Thursday, August 27, 2020
Giggles
I decided the next word should be GIGGLES. It's fun and silly.
 .
.
I knew where I wanted to go with the word, but it wasn't until I tilted the letters that I really started loving it.


I'm not quite sure about the L, but overall I am pleased.

Of course, looking at it now I think the third G needs to be a bit bigger. I want to make a pink butterfly as a companion to this word.
If you want to know how to make letters, you can get my tutorial here, at my Etsy shop. My letters are made without patterns or templates and they are NOT paper pieced.Sunday, March 1, 2020
Lynne & Julie: Swapping Duds and Making Magic
In late 2010 I was planning a class on free pieced letters, and I wanted a sampler that showed different kinds of letters.

The quilt Nine x Nine was the result.
 As usual, making the quilt generated a lot of dud letters.
 "Send them to me!" Julie wrote, "I'll make a quilt out of them. They are duds to YOU, but your students need to know it's still possible to make a great quilt!" I sent her all my dud letters, and then I prepared another box full of ALL the leftover bits I had squirreled away - mini trees, asterisks, butterflies, some free pieced houses and anything else I could find.
 Julie had no negative associations with my box of duds, and she made this quilt. There were so many pieces Julie would make a second quilt. She said it would be the back. While she worked on that, I had an idea.

I had been making a Rules quilt for myself, and made this black and white RULES word, which wouldn't work in the quilt. I looked at it and saw "jULiE" and "chRiS". OH HELL! Chris would quilt the quilt Julie was planning... so I went into the studio...
 Using the letters from RULES, I made JULIE and CHRIS. I put them in the box, sealed it up to mail it to Julie the next day. Then I went to bed.
I'm lying it bed and it hits me.. SHIT!
The next day after work I went into the studio, and prepared something else for Julie and put THAT in the mail the next day.
Two days later, Julie wrote to me, "Lynne... I just got your box... I have an idea...."
"CHECK YOUR MAIL TOMORROW!" I wrote back.

We had BOTH had the same idea. Since the quilt would be made from my letters and bits and pieces, and JULIE would be putting the pieces together and CHRIS would be quilting it, it would be a three way collaboration. It only made sense to have all three of our names on the quilt.
 As soon as I saw this picture of the "back" of the quilt, I told Julie I wanted a second quilt, and that I'd pay for the quilting. This was too good to be only the back of something. Julie included three houses in the quilt, and her explanation was: "Our houses have brown on the ground because we don't have any snow here in the winter. Your house (with the red roof) has white on the ground because you have snow right now."
I didn't have the heart to tell Julie that I when I made that house I envisioned it as a house on the Mediterranean Sea in bright sunlight with a tiled roof and surrounded by flowers. Heck, I'd take that as my house! Funnily enough, years later I would buy a house surrounded by flowers with a red door.
 This is the picture Julie sent me back in 2011 as she enjoyed the quilt before sending it to me.
 I was thrilled when the quilt arrived.
 I went home that night in 2011 and put the quilt on my bed, and it has stayed there ever since. If that isn't the highest compliment you can give a quilt, I don't know what is.
 But don't feel bad for the "Hidden Potential" quilt Julie made. It comes with me to every quilt class and lecture I give. I want students to know that even things they think are "duds" (I no longer consider them "failures") have potential.
 I was going to show this photo later in the story, but as Julie pointed out, it really belongs here. This is me, Julie & Chris (l to r) and the Magic Happens quilt. Julie reminded me that Chris quilted the quilt with black and white variegated thread, because my cat Millie is black and white and "her furs will be right at home."

The quilt Nine x Nine was the result.


I had been making a Rules quilt for myself, and made this black and white RULES word, which wouldn't work in the quilt. I looked at it and saw "jULiE" and "chRiS". OH HELL! Chris would quilt the quilt Julie was planning... so I went into the studio...

I'm lying it bed and it hits me.. SHIT!
The next day after work I went into the studio, and prepared something else for Julie and put THAT in the mail the next day.
Two days later, Julie wrote to me, "Lynne... I just got your box... I have an idea...."
"CHECK YOUR MAIL TOMORROW!" I wrote back.

We had BOTH had the same idea. Since the quilt would be made from my letters and bits and pieces, and JULIE would be putting the pieces together and CHRIS would be quilting it, it would be a three way collaboration. It only made sense to have all three of our names on the quilt.

I didn't have the heart to tell Julie that I when I made that house I envisioned it as a house on the Mediterranean Sea in bright sunlight with a tiled roof and surrounded by flowers. Heck, I'd take that as my house! Funnily enough, years later I would buy a house surrounded by flowers with a red door.


Tuesday, December 10, 2019
Holiday Time


There is no pattern for the quilt, but if you want to make birds like mine you can get my tutorial here, at my Etsy shop. My tutorial for the free-pieced letters can be found here. Both are instant downloads so you can get started right away.
Friday, August 9, 2019
Friday Thoughts
I'm doing some cleaning in my studio and I have this pinned to the wall, and I thought you might enjoy it:
 .
.
I've been reading Laura Lippman for a long time, so when her newest, Lady in the Lake, came out, recently, I got it right away. It didn't hurt that it got a rave review from Stephen King himself.
 .
.
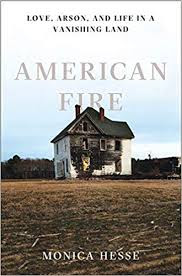
I've also just read American Fire, about a series of arsons in Virginia. How'd I hook up with that? There was an article in the New York Times about how every state has an infamous crime, and a book about it. After reading about all 50, I chose this one.
and I've discovered Bruno, the Chief of Police. Have so far read two, and have the next three already lined up.

Have a nice weekend. I'll be teaching birds at Quilted Threads (and wrestling with signing up for Medicare, parts A and D.)

I've been reading Laura Lippman for a long time, so when her newest, Lady in the Lake, came out, recently, I got it right away. It didn't hurt that it got a rave review from Stephen King himself.
I've also just read American Fire, about a series of arsons in Virginia. How'd I hook up with that? There was an article in the New York Times about how every state has an infamous crime, and a book about it. After reading about all 50, I chose this one.

and I've discovered Bruno, the Chief of Police. Have so far read two, and have the next three already lined up.

Have a nice weekend. I'll be teaching birds at Quilted Threads (and wrestling with signing up for Medicare, parts A and D.)
Wednesday, July 31, 2019
Year 2019
I made the numbers for the year on the signature panel of the Not Paper Pieced quilt.

And you know me, I couldn't resist adding a fun element to the hole in the zero. The lady is saying, "I'm watching you! No paper was harmed in the making of THIS quilt!"
 So here it is. I've got to add fabric around the word sections to make it a big panel and then piece it into the rest of the backing.
I briefly considered making the numbers pink, but I felt they would draw too much attention, so they are gold.
AND BEFORE ANYBODY SAYS ANYTHING... I think there is a bit too much space between the T and the Y in TYLER, and a smidge too much space between the 0 and the 1 in 2019, and the diagonal leg of the 9 is too narrow. The second Y is made of components that are probably a bit too thick. Of all of those things, what I might fix is the numbers.
Otherwise, as the French say, "Tant pis." (And I'm 90% sure those of you who don't speak French can figure it out.)
In my tutorial on "Liberated" letters, not only do I tell you how to make all the letters in the alphabet without patterns, templates or (god forbid), paper-piecing, I also tell you how to make numbers. You can get it here, on my Etsy shop. It's full of absolutely everything you need to know to make letters and make them well.

And you know me, I couldn't resist adding a fun element to the hole in the zero. The lady is saying, "I'm watching you! No paper was harmed in the making of THIS quilt!"

I briefly considered making the numbers pink, but I felt they would draw too much attention, so they are gold.
AND BEFORE ANYBODY SAYS ANYTHING... I think there is a bit too much space between the T and the Y in TYLER, and a smidge too much space between the 0 and the 1 in 2019, and the diagonal leg of the 9 is too narrow. The second Y is made of components that are probably a bit too thick. Of all of those things, what I might fix is the numbers.
Otherwise, as the French say, "Tant pis." (And I'm 90% sure those of you who don't speak French can figure it out.)
In my tutorial on "Liberated" letters, not only do I tell you how to make all the letters in the alphabet without patterns, templates or (god forbid), paper-piecing, I also tell you how to make numbers. You can get it here, on my Etsy shop. It's full of absolutely everything you need to know to make letters and make them well.
Tuesday, July 30, 2019
Black Butterflies

I liked the black butterflies in the Ghastly fabric, and wanted to use them in the quilt somehow
.


If you want to make your own butterflies, you can get my tutorial here.
If you are interested in learning how to make free-pieced letters that don't use templates or patterns and AREN'T PAPER PIECED... you can get that tutorial here. Both tutorials are instant downloads so you can get started right away.
Monday, July 29, 2019
Signature Panel, part two

If you want to make patchwork letters, you can get my tutorial. No patterns, templates or (gasp!) paper piecing needed. Get it here, at my Etsy shop. It's an instant download so you can get started right away.
Sunday, July 28, 2019
Signature Panel & Maiden
First things first. When I got an alert on my phone that the movie MAIDEN was showing an hour's drive away, I made plans to go see it with my Dad, who loves sailing. It was a terrific movie, and it's a hell of a story. (It got a 98% on Rotten Tomatoes). You ought to find, and see it if you can. Click the link for more information.
 I am working on getting the backings ready for quilts to bring to Janet Lee next week, and I had to make the backing for the No Paper Pieced quilt.
 As soon as I laid the fabric on the floor to figure out how I was going to sew it into a backing I realized this quilt (of ALL my quilts), needed a signature panel. So I got to work making letters.
My letters are free-pieced, meaning they aren't made with templates or patterns and they are most decidedly NOT PAPER PIECED!! If you would like to make your own, you can get the tutorial here, at my Etsy shop. It's an instant download so you can get started right away.


My letters are free-pieced, meaning they aren't made with templates or patterns and they are most decidedly NOT PAPER PIECED!! If you would like to make your own, you can get the tutorial here, at my Etsy shop. It's an instant download so you can get started right away.
Wednesday, June 26, 2019
Size and Space Matter


You can see some of the things I've hidden in between the NOs. I see two things I want to change. The man between the two NOs in the top row needs to move so he's leaning next to the NO on the left. Right now he's sort of hanging in mid air. Now that I know I have that much space, I may fill it with the rest of his body.

The light grey NO on the left side, opposite the Grouchy Seamstress is now too light. When I envisioned the border of NOs I thought of them as very low key, but they got darker and brighter. Now that one looks like a hole through which the rest of the quilt (and the precious viewer's eye) can escape. Can't have that!

We're in the home stretch.
Tuesday, June 25, 2019
Almost There!
I got four yards of my background fabric in the mail today. I probably only needed three, but more is better. I am finished with the body of the quilt itself. Now all I have to do is add the border of Nos and then the outer border of more background fabric. You know, "all."
Yesterday I sized and sewed some of the NOs together. I couldn't sew them together into long pieces because their length would be determined by the finished size of the body of the quilt and the way I want the NOs to fit in a rather tight border around it.
 I am really sorry I can't make this picture better. The quilt is really cool in real life, but you've been looking at it sorta like this for so long that the little details are almost too small to see.
The grouchy lady in front of the sewing machine is now hiding in the border of NOs along with a man, a mischievous boy, a group of black butterflies, a grouchy gardener and at least one cat. I plan on moving a couple of NOs around so the bottom row doesn't look so empty and the top row doesn't look so crowded.
Outside of the NOs will be a 3 inch border of the background fabric, and then this will be finished.
It's worth noting that since I started this on April 10th, the only thing that has stayed put in the quilt is the big grouchy lady and the word QUILT. (And the birds, I suppose.) The NO, THIS, IS, NOT (made the NOT four times, by the way), PAPER and PIECED were all made twice.
Many of you think I am off my rocker. I have heard the word "courageous" bandied about, but I do not think of myself as "courageous." I'm persnickety, I'm demanding, I'm persistent, but above all I consider myself "creative." I know what I want, and I'm going to work until I get it. NOT "getting it" is not an option. And the idea that I CAN'T do it NEVER crosses my mind. I have absolutely ZERO doubt that I will solve the problem. (Ask Julie how many times she's heard me say that. Go read "The Value of 'Meh.'")
I actually LIKE not starting with a complete idea (the very anathema of paper-piecing) and figuring it out as I go along. I LIKE thinking about it when I am not working on it, and getting ideas and changing things around to push forward the IDEA I have in my head.
There's a quote that the Ringling School of Art used as advertising years ago: "A good idea is only an IDEA until you make it REAL." You know you've succeeded when you don't have to EXPLAIN it to anybody, because the piece says it on its own.
Sigh, yeah I know. This quilt DOES have to explain it, but it certainly DOESN'T have to explain how I feel about it! LOL
Yesterday I sized and sewed some of the NOs together. I couldn't sew them together into long pieces because their length would be determined by the finished size of the body of the quilt and the way I want the NOs to fit in a rather tight border around it.

The grouchy lady in front of the sewing machine is now hiding in the border of NOs along with a man, a mischievous boy, a group of black butterflies, a grouchy gardener and at least one cat. I plan on moving a couple of NOs around so the bottom row doesn't look so empty and the top row doesn't look so crowded.
Outside of the NOs will be a 3 inch border of the background fabric, and then this will be finished.
It's worth noting that since I started this on April 10th, the only thing that has stayed put in the quilt is the big grouchy lady and the word QUILT. (And the birds, I suppose.) The NO, THIS, IS, NOT (made the NOT four times, by the way), PAPER and PIECED were all made twice.
Many of you think I am off my rocker. I have heard the word "courageous" bandied about, but I do not think of myself as "courageous." I'm persnickety, I'm demanding, I'm persistent, but above all I consider myself "creative." I know what I want, and I'm going to work until I get it. NOT "getting it" is not an option. And the idea that I CAN'T do it NEVER crosses my mind. I have absolutely ZERO doubt that I will solve the problem. (Ask Julie how many times she's heard me say that. Go read "The Value of 'Meh.'")
I actually LIKE not starting with a complete idea (the very anathema of paper-piecing) and figuring it out as I go along. I LIKE thinking about it when I am not working on it, and getting ideas and changing things around to push forward the IDEA I have in my head.
There's a quote that the Ringling School of Art used as advertising years ago: "A good idea is only an IDEA until you make it REAL." You know you've succeeded when you don't have to EXPLAIN it to anybody, because the piece says it on its own.
Sigh, yeah I know. This quilt DOES have to explain it, but it certainly DOESN'T have to explain how I feel about it! LOL
Sunday, June 23, 2019
R Redo


Subscribe to:
Comments (Atom)