Foreword
I wrote this post on Tuesday, July 28th, before "The Ruler Rant" was published. Never, in my wildest expectations did I expect that post to generate over 700 hits in less than 24 hours. This post, "How I Cut" was supposed to be published the next day, on July 29th, but the comments The Ruler Rant generated simply had to be addressed, so I postponed the publication of THIS post by a day, to respond to those comments. What I did NOT do, however, was change anything in the post you are about to read. It is below, exactly as I wrote it on the 28th.
~ ~ ~ ~ ~
Once I was given permission to arrange my work in the way it best suited me, I didn't hesitate to rearrange things I thought were dumb.
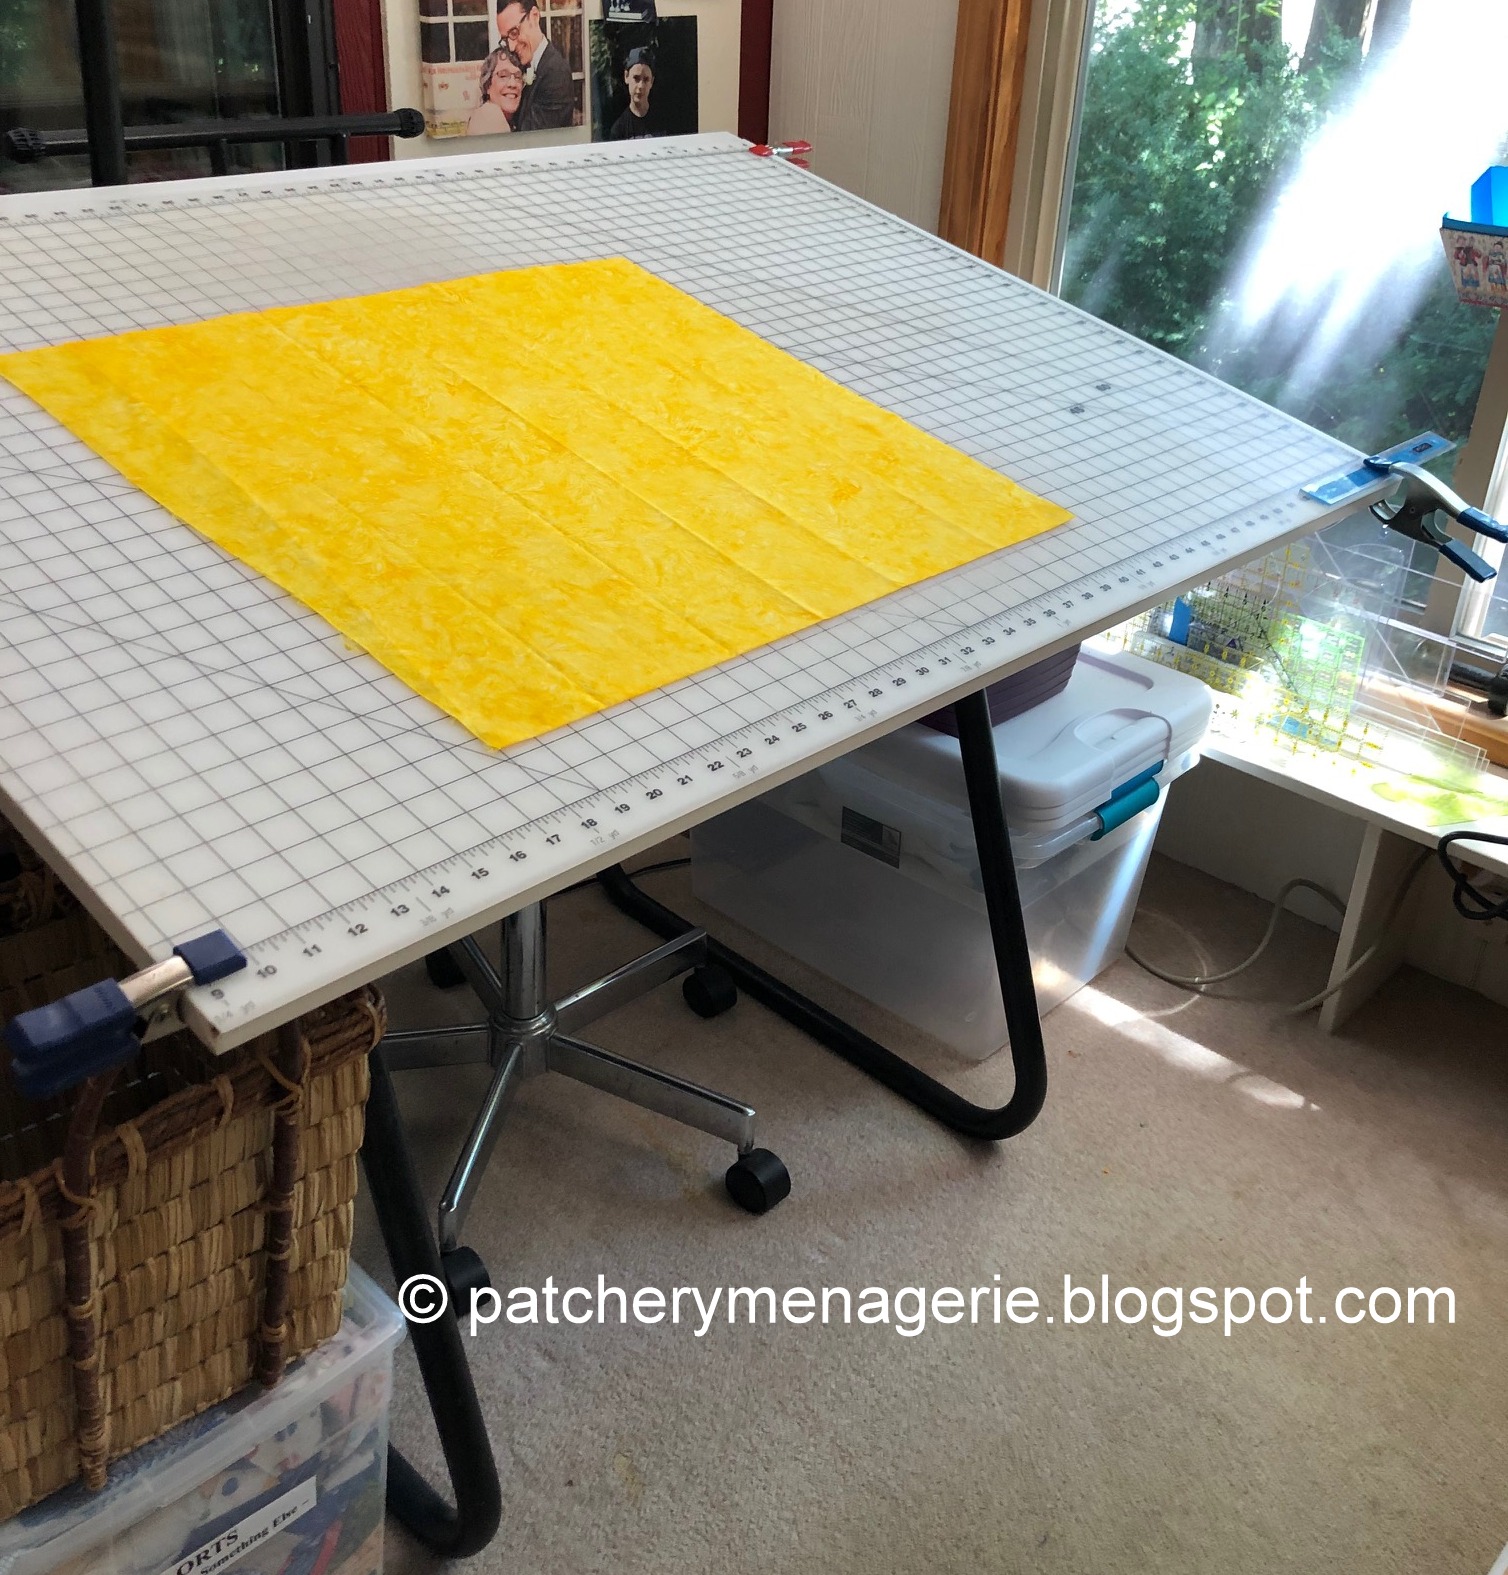
Bending over a flat work table to cut strips is uncomfortable. If the table is too low, like a dining room table, it hurts to keep bending over. If the table is too high, I have to stand on my tiptoes. To use a rotary cutter when you aren't stable can lead to wobbly cuts and wasted fabric. It didn't take me long to figure out that it would be better to use my big drafting table at an angle. I bought a giant cutting mat and cut it to the size of the big table, and held it in place with big clamps I bought at the hardware store. I worked at a hardware store while I was in college so I was familiar with the wonderful goodies found there.
(By the way, I NEVER use the lines on the cutting mat as cutting guides. Frankly, I find the lines on the mat distracting.)

I'm a big believer in working efficiently, in working SMARTER, not HARDER. If you know how I make legs for my birds, you get my point. So if I have a lot of strips to cut I want to be able to get them all cut with the least amount of effort. I experimented and then worked out a way that made perfect sense to me.

Of course, you have to start with the ground rules. The fabric has to be FLAT, which means it should have been WASHED and IRONED. It should be folded so the selvages are together. The folded edge should be crisp, so you can line up a ruler against it and know that when you are cutting a folded piece of fabric you end up with a STRAIGHT piece instead of a V-shaped piece. There shouldn't be pins or clumps of thread or other debris lying under your fabric. Your rotary cutter should be SHARP. You work harder with a dull blade. If your blade has a nick in it, replace it. Really.
Did you notice in that top picture the fabric is ALL BY ITSELF on that big table? I'm right handed, and I am going to start on the right edge and work my way to the left. AT NO TIME will I have to move the piece of fabric. EVERY TIME YOU SHIFT THE FABRIC, you risk getting it out of alignment.
I start by trimming the RIGHT edge of my fabric straight. I am right handed. I will run my blade alongside the RIGHT edge of any ruler or template I use.

DO NOT MOVE THE FABRIC...
Next, I place a wide ruler on the right side of that cut, and I gently slide it over until the edge of the ruler butts up against the edge of the fabric.
(Now I know I am silly, but I prefer to cut through no more than two layers of fabric at a time. So my fabric here is folded and the selvages are at the top, and the fold is at the bottom. Two layers. I like accuracy. You won't hurt my feelings if you cut multiple layers, but don't come to me whining if they aren't all exact.)

Next I take the template I want, (this is the 2.75" x 24" orange strip), place it on top of my fabric, butting it up against the clear ruler on the right. Because the clear ruler is up against the fabric, my orange template can butt up against it, and I know it is lined up properly.

Next I take ANOTHER big wide ruler and gently butt it up against the LEFT edge of my template. I make sure everything is lined up snug and straight.

Next, I lean my left arm down on the big wide ruler, putting weight on it. My pinkie finger catches the left edge of the ruler, pressing down. I am putting weight on this big wide ruler, my hand and pinkie finger prevent the ruler from sliding to the left. This also prevents the fabric underneath from shifting.


I slide the newly cut strip aside, and get ready for the next cut. (I always realign the ruler with the bottom edge, and straighten if need be.)
THE BIGGEST ADVANTAGE OF THIS METHOD is that if my rotary cutter goes astray, I have only cut into the width of the fabric strip I am cutting (here it's 2.75"). But there are other advantages. Because I am resting my weight on a large ruler, I exert a lot of pressure, and the ruler, and the fabric beneath it is less likely to slip. Because I am not trying to put a lot of pressure on a narrow strip, the chance of an inaccurate cut is virtually nil.
It takes longer to explain than it does to do.
Let's look at THE OTHER WAY...

This what I see everybody do at quilt shops. They line up the left edge of fabric along one of the vertical lines on the cutting mat, and the fold along a horizontal line. Usually they layer about four different fabrics one on top of each other. Then they line up a ruler so the right edge is 18" or whatever distance away they want to cut, and they cut along the right side of the ruler. What happens if they slip?

OOPS! This is a little slip. But it could easily have gone very wrong and cut deeply into the fabric on the right.
Now I can live with this method if you are cutting wide pieces. But I didn't see anybody straighten that edge over there on the LEFT! If you cut your fabric this way, what do you do? Do you straighten the edge on the right, then flip the fabric around, lay it down flat, hope everything is straight, and then measure from the left edge and cut on the right side of your ruler/template? To me, that's living dangerously. Besides, it's one more step. After you flip the fabric over, you STILL have to make sure the edge is straight. So now you've done the same thing TWICE! (Not efficient.)
OK, so what do you do when you want a narrow cut, like 2"?

This is clearly fraught with possibilities of bad things happening. Sure, I could cut this 2" strip, but I had to move my hand on the cutting ruler three times so I had adequate pressure on the template the length of the fabric. And I had to basically make three cuts. And I had to make sure I didn't cut myself.
I can hear you all already, "Well, see, Lynne, THAT's why we don't use those skinny templates. THAT's why we use the nice big rulers with all the lines.."

So are you guys going to tell me THIS IS BETTER? Because to me, it surely isn't. To me there isn't enough pressure applied the the ruler and the fabric beneath to make a good accurate cut. And those of you who apply a weight to the ruler, you think that is better? I disagree. I think it is too many "moving parts," and ALL OF WHICH can wiggle way too easily while cutting with the rotary cutter, which can result in inaccurate cuts. And of course, you had better be sure you used the right line on the ruler.
I've tried it both ways. Neither one is "right" or "wrong." I'm a firm believer that you should do whatever works for you.
I've given it a lot of thought. What I am after is good, consistently accurate cuts that can be done quickly and efficiently with a minimum of fuss and fabric handling. I'm not interested in using twelve steps when six or eight will do. From the time I set a piece of fabric on my cutting table, I can cut four perfect strips using my technique in less than 60 seconds. And yes, that includes straightening the right edge.